

Designing a Company History Timeline Wall: A Practical Guide
Timeline walls are more than just decorative installations. They’re an opportunity to tell your brand story in a space your team and visitors experience daily. When designed well, they combine visual storytelling with interior branding, enhancing both aesthetics and identity. Done poorly, they become cluttered, outdated or overlooked. This guide outlines everything you need to consider when designing a compelling and practical company history wall.
Why Timeline Walls Matter
Timeline walls serve multiple purposes. They give visitors insight into your company’s journey, highlight key achievements, and strengthen internal culture. In many offices, they act as a statement piece, offering a focal point that’s both informative and inspiring.
In sectors like property, finance, education or healthcare, a timeline wall can reinforce trust by demonstrating longevity and experience. In fast-moving industries such as tech or creative, it can communicate progress, adaptability and innovation.
Where to Start: Purpose and Audience
Before diving into design, determine the purpose of your timeline. Is it to educate clients? Celebrate milestones with staff? Impress visitors? Understanding your goal helps inform tone, scale, and level of detail.
Your audience matters. If most foot traffic is internal, the wall might include team photos or inside jokes. If it’s customer-facing, you’ll want a more polished, professional look. In either case, clarity and cohesion are essential.
Choosing the Right Wall and Location
High visibility areas work best. Choose spaces like:
Reception walls
Hallways leading to meeting rooms
Open-plan breakout zones
The wall’s size and lighting conditions will influence what’s possible. An expansive wall with natural light might allow for dimensional lettering or built-in lighting. Narrow corridors or dark corners may need high-contrast vinyl and carefully planned spacing.
Avoid locations where the wall might be obscured by furniture or temporary fixtures. And make sure the surface is clean, dry, and smooth enough for vinyl or printed panels to be installed correctly.
Content: What to Include
Not every milestone matters. Select events that support the message you want to convey. That could include:
Year of founding
Key expansions
Major contracts or launches
Awards or accreditations
Office moves or rebrands
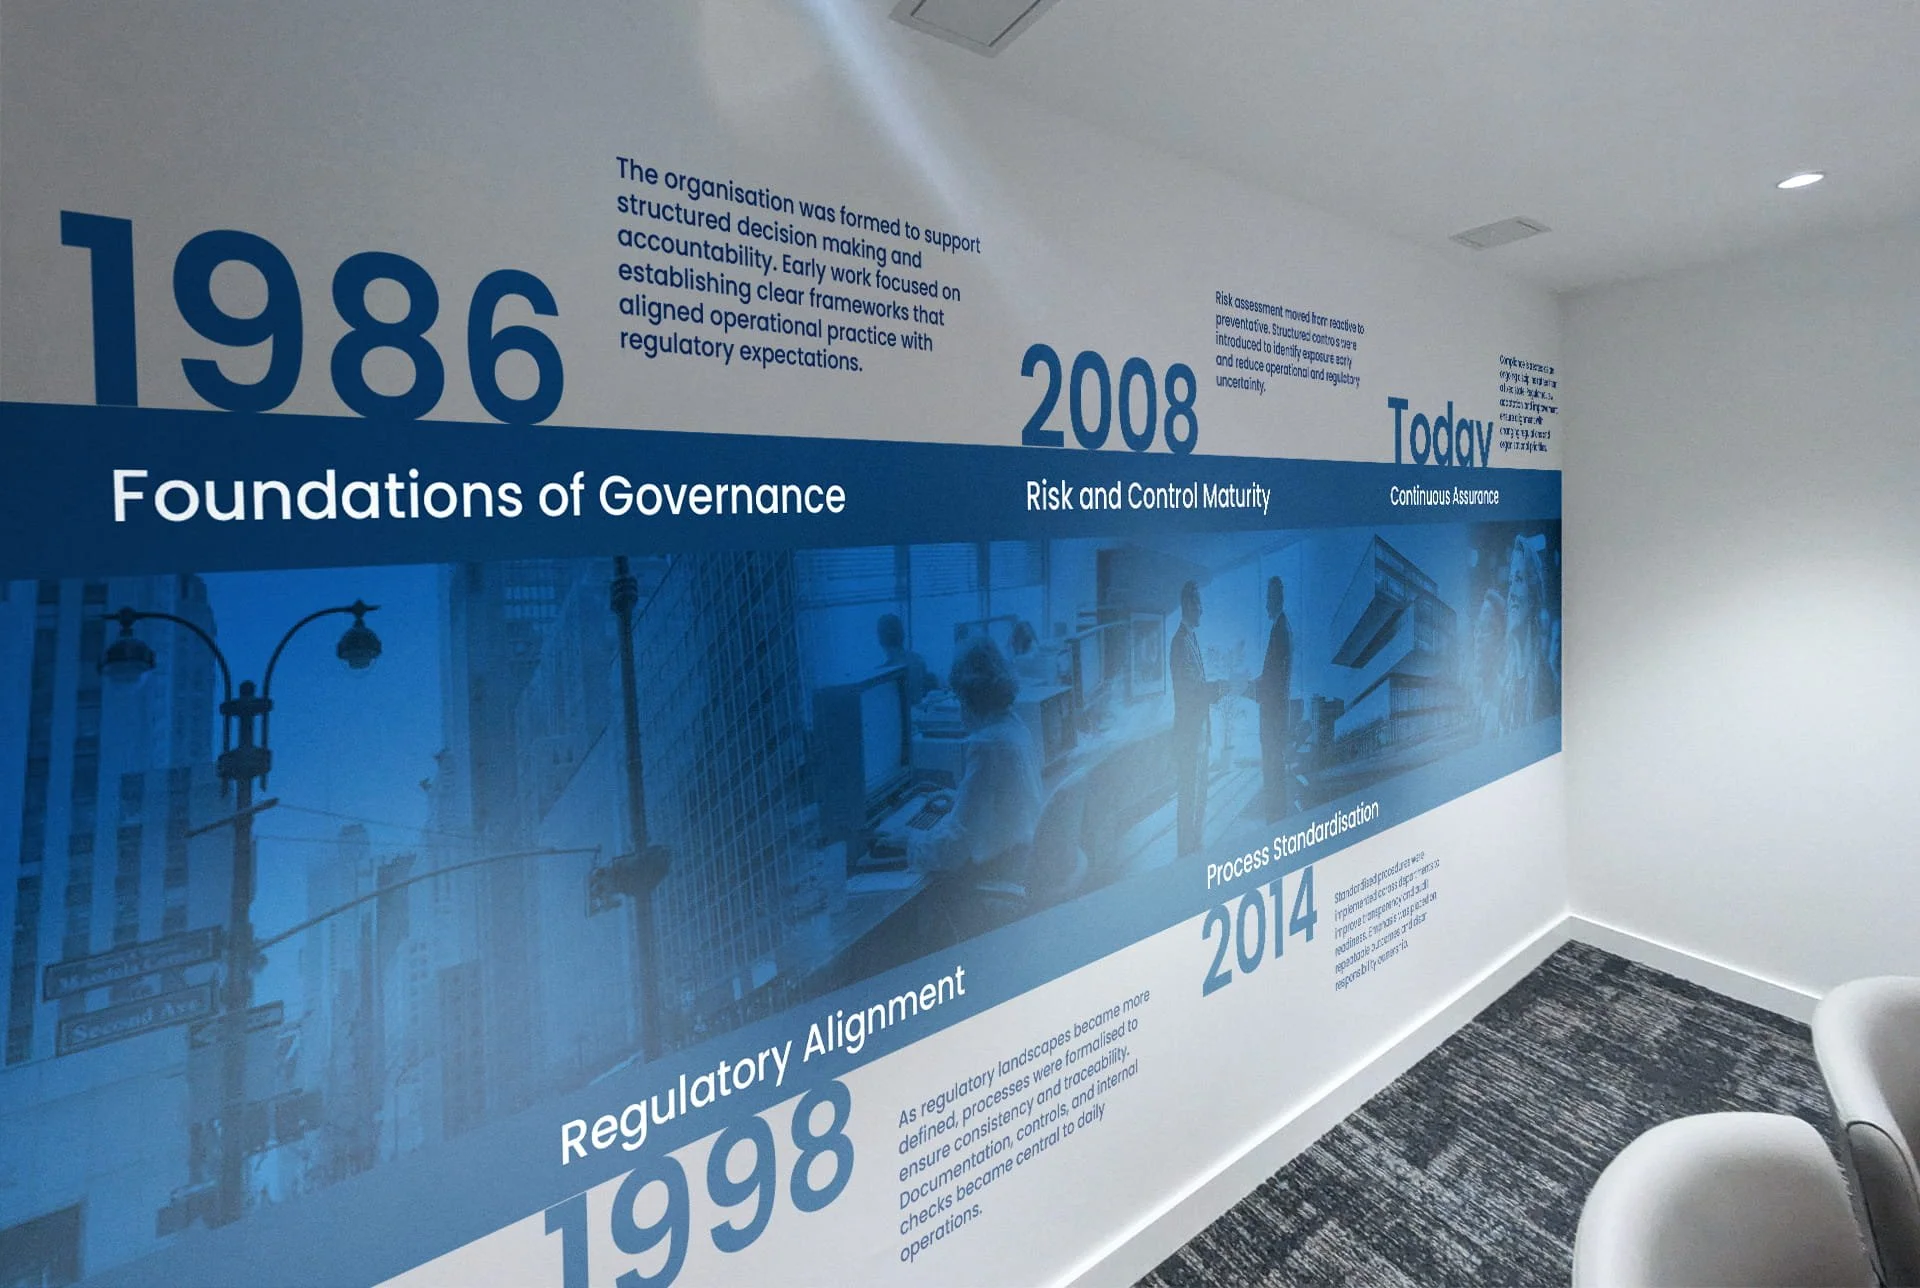
Balance historical facts with moments of culture—team achievements, early sketches, or humorous anecdotes can add personality. Include images where appropriate but make sure you have rights or high enough resolution for large-scale printing.
Avoid long paragraphs. Short phrases and dates work best, allowing readers to scan easily while walking past.
Visual Flow and Layout
Timeline walls should read like a story. Maintain consistency in spacing between events, but don’t feel constrained to a rigid line. A meandering layout can feel more organic. Just ensure each step feels connected and logically sequenced.
Group content into eras or phases if your business has clear chapters. Use subtle changes in background colour, icon style or material to differentiate periods without disrupting the overall flow.
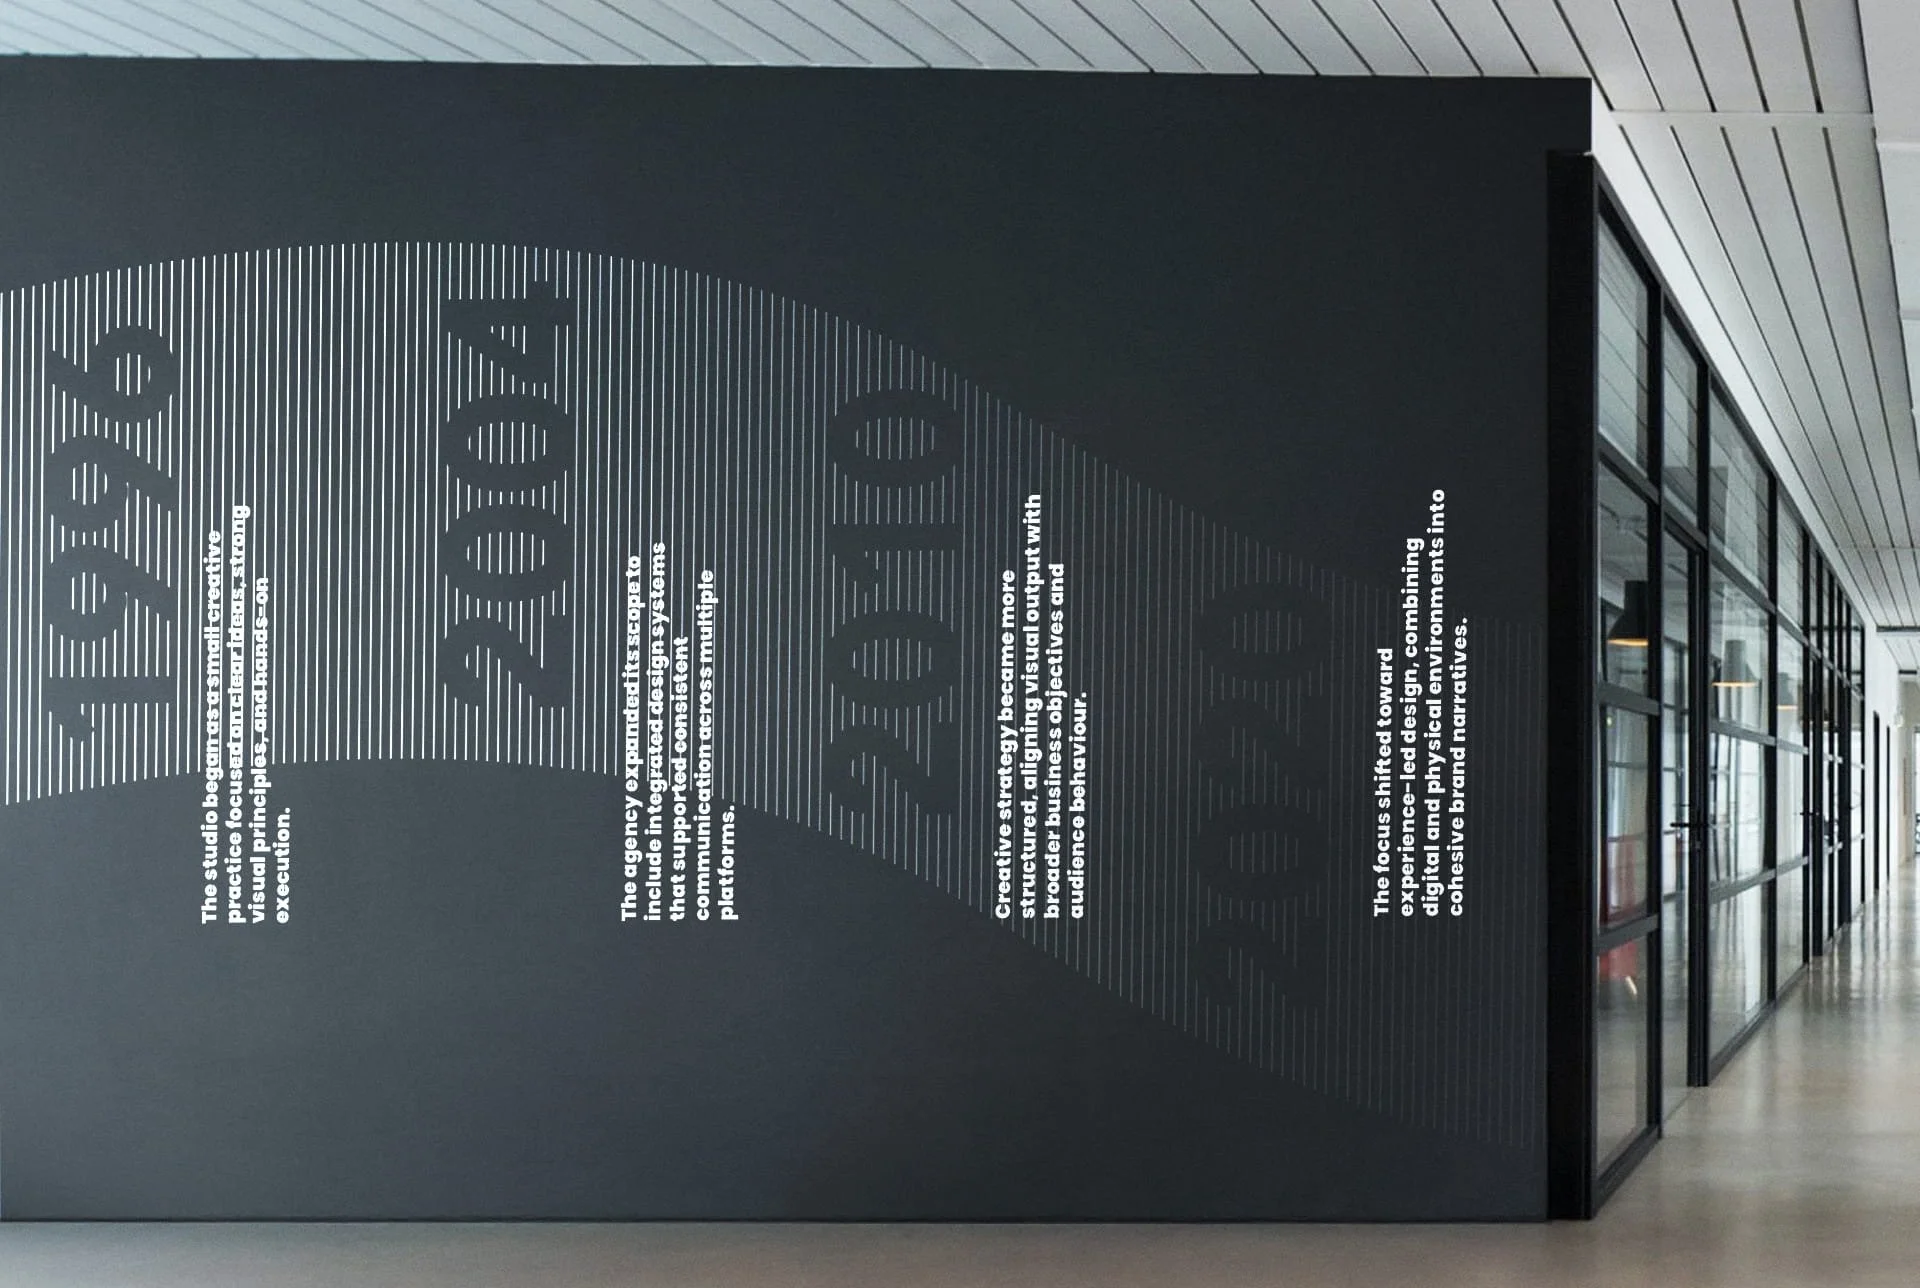
Material and Finishes
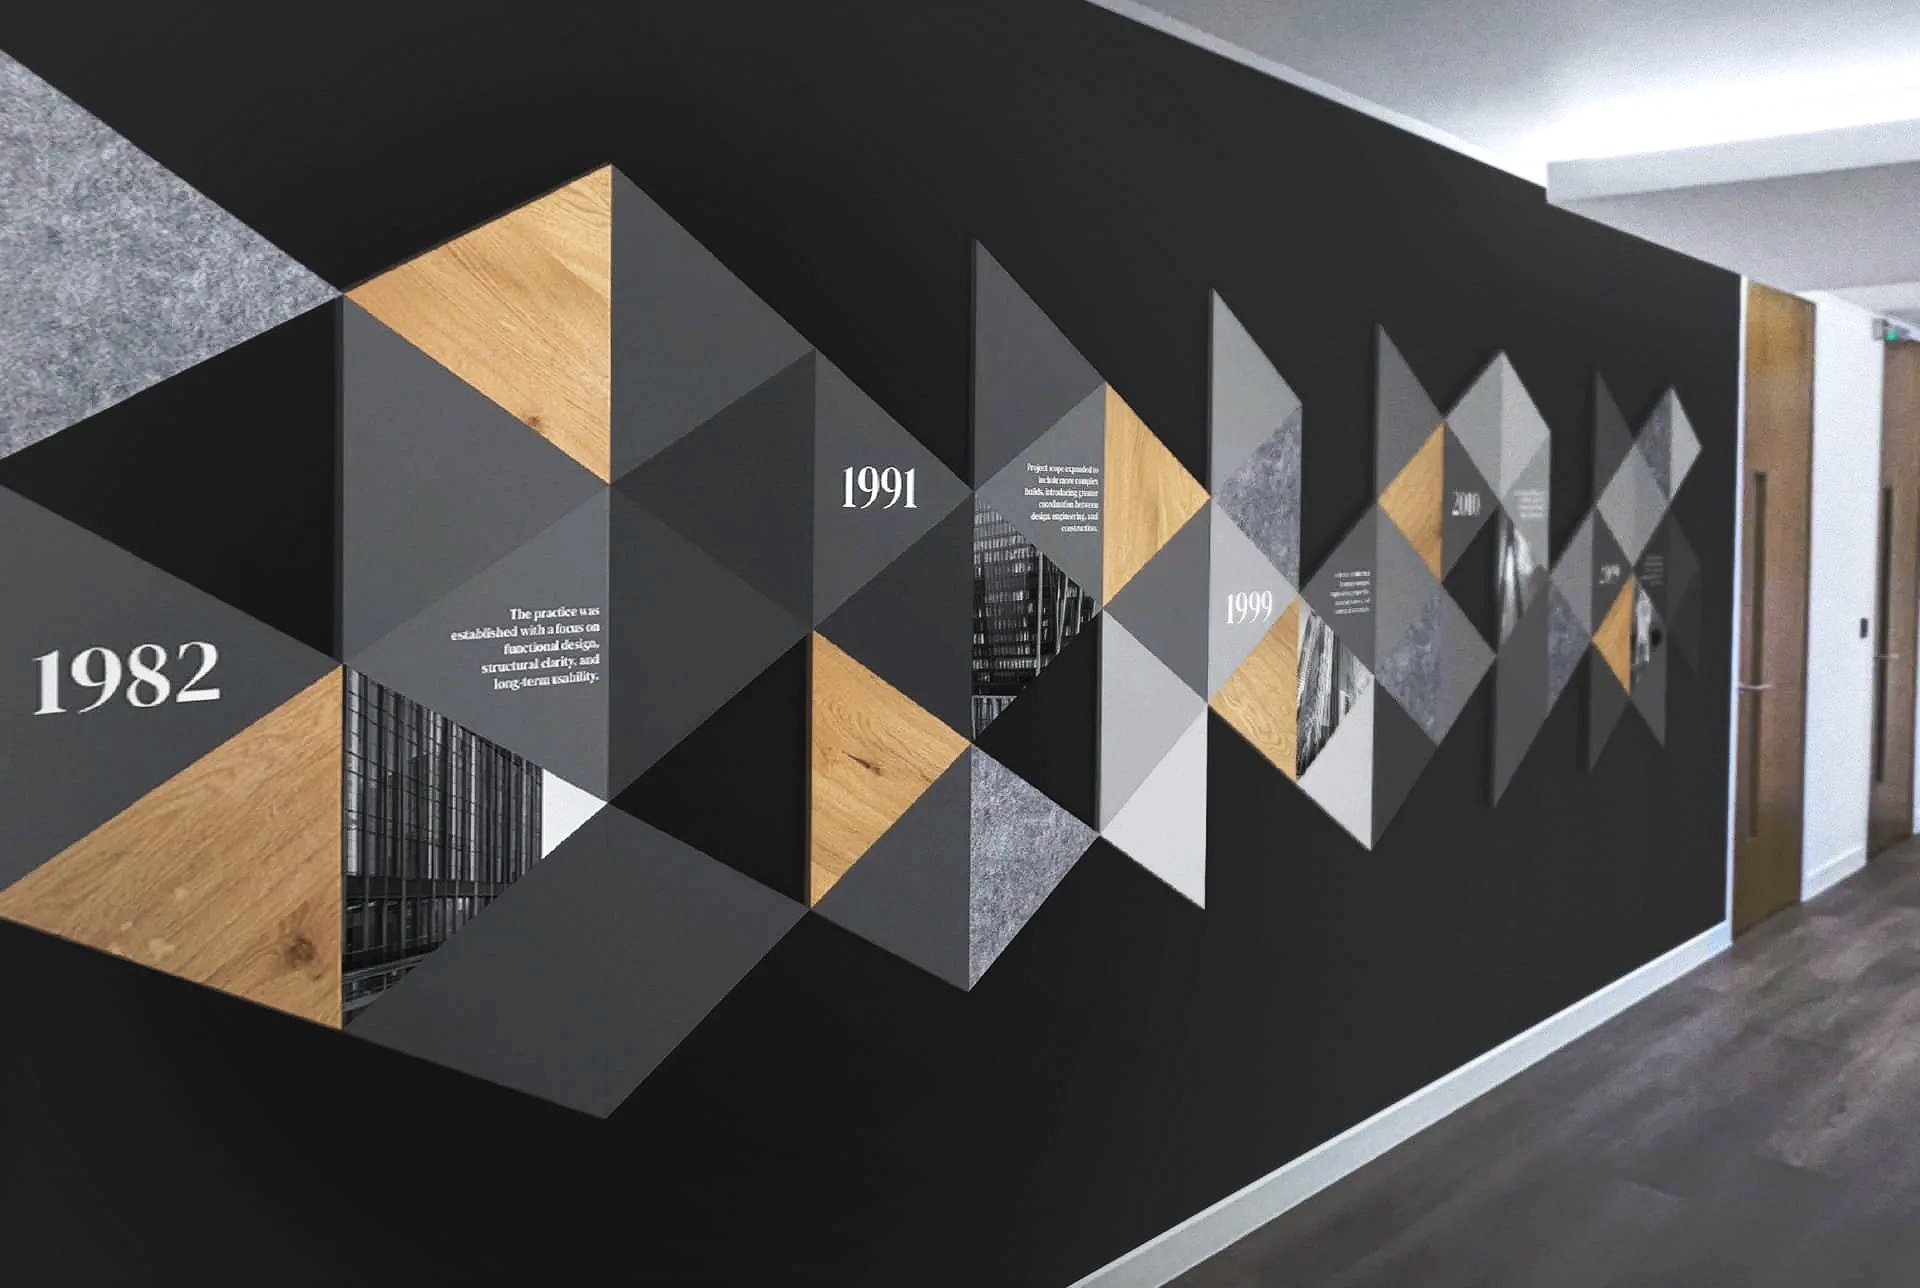
This is where your interior branding and signage strategy comes into play. You’re not limited to flat prints.
Options include:
Cut vinyl graphics for clean, minimal designs
Printed Panels for modular updates or highlights
Dimensional lettering for logo or era markers
Full-height wall wraps for immersive branded backdrops
Printed acrylic panels for modern, high-contrast visuals
These can be used in combination, or paired with architectural finishes, artificial foliage, or LED illumination to create more tactile, layered results.
Getting the Scale Right
Details matter. Measure the full space including skirting, ceiling drops, switches, and architectural interruptions. If the timeline is to span multiple panels, account for spacing so that the flow isn’t broken or distorted.
Font sizes must be legible from intended viewing distances. Important milestones can be larger, but don’t shrink secondary text so small that it can’t be read comfortably.
Too much content will feel crowded. Leave breathing room. The wall should invite attention, not overwhelm it.
Common Mistakes to Avoid
Overloading with detail: Stick to what matters, don’t try to list everything.
Inconsistent styles: Keep typefaces, colours, and iconography aligned with your brand.
Poor image quality: Low-res photos may look fine on screen but blur badly when enlarged.
Lack of future planning: Leave space for upcoming milestones or make it modular.
Incorrect measurements: Errors here can ruin alignment or result in reprints. Always measure with precision.
Thinking Ahead: Updating Your Timeline

Companies grow, and so should your timeline. Plan for updates—either by leaving gaps or designing with swappable sections. Tray-mounted signs, magnetic panels, or modular vinyl blocks are ideal for this.
Avoid placing permanent or expensive features in areas that are likely to change. Instead, use printed panels or wall wraps with vinyl overlays to easily update content while keeping core design intact.
Bringing Brand into the Build
The timeline wall is not separate from your identity. It should look and feel like your brand. That includes:
Colours and materials matching your guidelines
Logo usage and placement
Use of brand fonts or approved alternatives
If you’re using bold design systems in digital or marketing, they should translate to this space as well. It’s an opportunity to bring your brand into a three-dimensional, physical format.
Combining with Other Brand Elements
Timeline walls don’t need to exist in isolation. At Grafiscape, we often integrate them into larger interior branding systems. That could include:
Logo walls near entrances
Foliage or green panels for softness and depth
Illuminated features for key milestones
Acoustic panels with printed layers
Wayfinding signs that share visual language
Together, these elements create a cohesive experience across your space.
Choosing the right supplier
We provide end-to-end support for businesses looking to bring their history and identity into the built environment. Our process begins with understanding your brand, reviewing your space, and planning the best visual and material strategy.
Whether you’re starting from scratch or want to refresh an outdated timeline, we can guide you through:
Content selection and structure
Design and layout development
Material and production choices
Installation planning
All elements are produced and installed in-house, ensuring consistency, accuracy, and quality.
Final Thoughts
A well-executed timeline wall does more than mark years, it builds connection. It gives visitors something to engage with, makes staff proud of the journey, and gives physical form to your business’s evolution.
Designing one requires more than visual flair—it needs a balance of storytelling, branding, and practical installation. When approached properly, a timeline wall can be one of the most powerful statements in your space.
If you’re considering creating or refreshing yours, Grafiscape is here to help translate your history into a striking visual narrative.